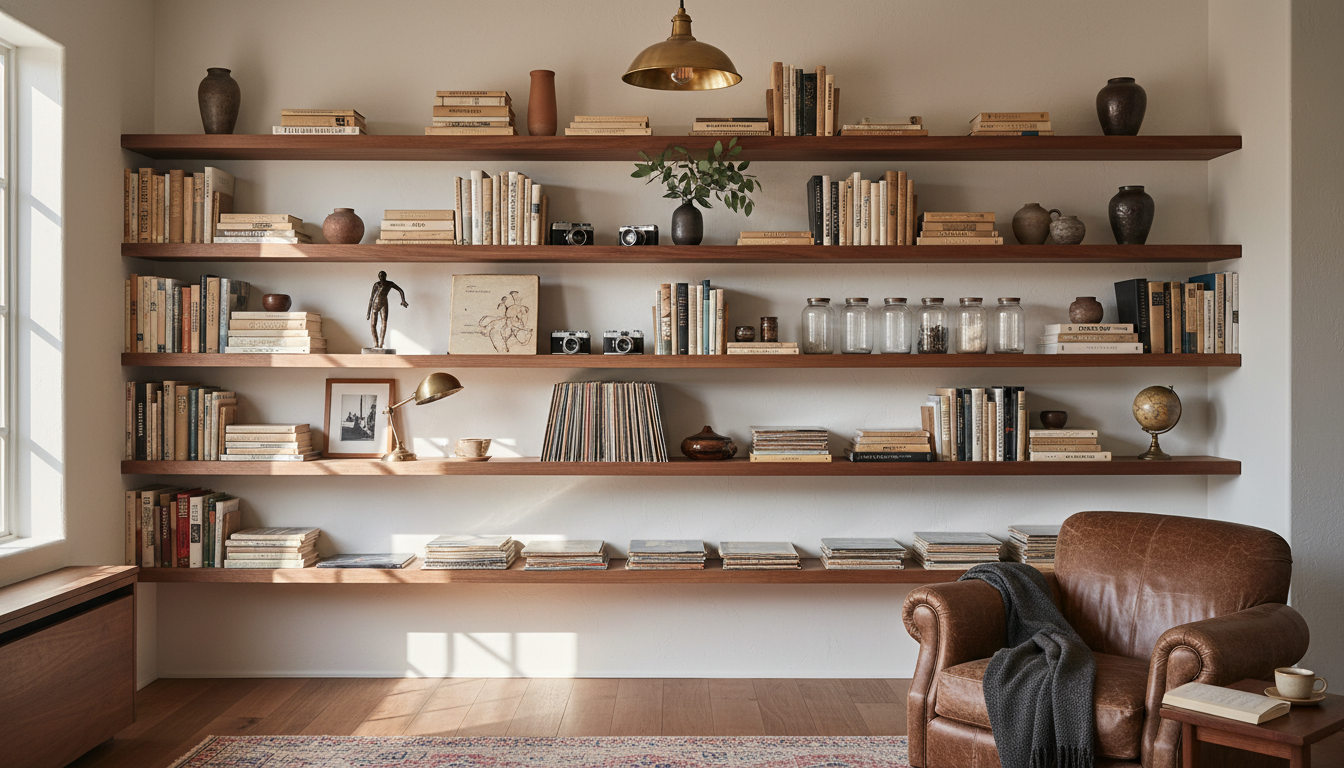

Most floating shelf installs aren't difficult. They're just done with the wrong assumptions. People treat the bracket as decorative hardware, install it like decorative hardware, and then wonder why the shelf sags like decorative hardware six months later when they put real weight on it.
This guide walks through the exact install process for a floating shelf rated to hold 300 lbs, using the Hovr Bracket System. It assumes you're starting with a shelf at least 1 7/8" thick (though we generally recommend 2" ideally for the Hovr Classic) and a wall with wood studs behind drywall - the most common residential install. We'll note where the steps change for thinner shelves, metal stud walls, concrete, or tile.
Total install time for a single shelf, once you've done it once: about 45 minutes.
Before You Start: Preflight Checklist
Have these on hand before you make a single hole:
The bracket and install kit:
- Hovr Bracket System - Classic for shelves 1 7/8" thick or thicker, Slim for thinner shelves
- Installation Hardware Pack - ships with the bracket, includes the screws, set screws, bit, and hex key you need
- Note: For a first time install, you may also need the Bit Pack which you can purchase on the accessories section of our shop page. This is needed if you don't have the right bits to tap and thread the set screw holes in the underside of the shelf.
Tools:
- Drill with a Phillips head bit
- Stud finder (magnetic is fine, electronic is better)
- 4-foot or 6-foot level
- Pencil and tape measure
- Hex key (included with the bracket)
- Router with a straight bit - only if your shelf isn't already routed for a hidden bracket
Conditions:
- The wall behind your shelf has wood studs at standard 16" (most common) or 24" centers (alternate substrates handled below)
- The shelf is at least 1 7/8" thick (Classic) or 1 1/4" (Slim)
- The shelf has solid backing where the bracket will bite - solid hardwood, plywood, or properly built MDF box construction with internal rails. Bare MDF panel edges will not hold under load.
- A clear floor or work surface to lay the shelf face-down for prep
If you're working with metal studs, concrete, brick, or tile, the install is mostly the same but the wall-side fasteners change. The Hovr knowledge base has substrate-specific notes - when in doubt, contact Hovr before drilling.
Step 1: Plan and Mark Your Stud Locations
This is the single most important step. Drywall anchors alone - even good ones - top out around 50–75 lbs in real-world conditions, regardless of what the package claims. For any shelf you'll actually load with weight, the wall-side bracket has to be fixed into wood studs.
Use the stud finder to locate the studs along the wall section where the shelf will go. Mark the center of each stud, not the edge. The Hovr Classic install assumes two studs and four screws (two per stud), so your bracket needs to be long enough to span at least two studs - typically that means a bracket of at least 18 inches on a wall with standard 16" stud spacing.
Once the studs are marked, decide on the shelf height and use the level to draw a faint horizontal line at that height across the wall. This is your reference line for the top of the wall-side bracket.
Common mistake: placing the shelf so the bracket only catches one stud. If your shelf is short, find a wall section where two studs fall within the shelf's length, even if it means moving the shelf a few inches left or right.
Step 2: Prep the Shelf
If you bought a pre-routed floating shelf, skip to Step 3.
If you're routing the channel yourself:
- Lay the shelf face-down on a flat work surface with the back edge facing up.
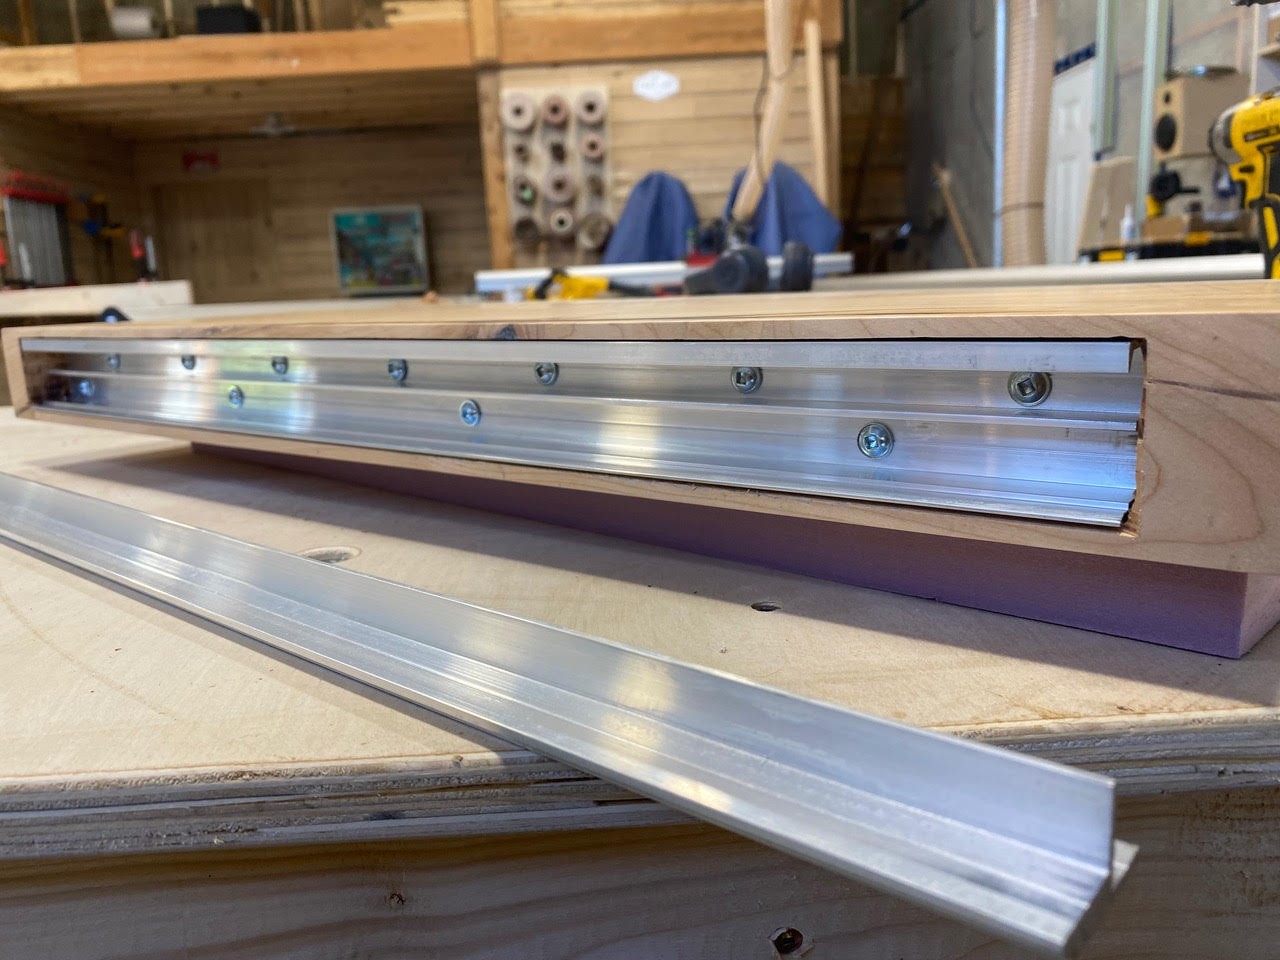
- Mark the channel along the back of the shelf - typically centered along the back face, running the full length of the section where the bracket will sit. The channel needs to match the dimensions of the female (shelf-side) bracket.
- Use a router with a straight bit to cut the channel to depth in multiple passes - never try to hog out the full depth in a single pass.
- Place the female bracket in the channel and drive the included screws through the bracket into the shelf's backing material.
This last step is where solid backing matters. If your bracket screws are biting into MDF panel edges instead of solid wood or plywood backing, the screws will pull out under load - usually weeks or months after install, when the screws have had time to work loose under cyclic loading.
Common mistake: Routing the wrong depth in the channel. The bracket needs to be flush against a hard surface like tile, or have the bottom lip protrude just the tiniest amount to bite into the wall on a harder material like drywall.
Step 3: Mount the Wall-Side Bracket
Hold the wall-side (male) bracket up against your level reference line and mark the screw hole locations directly over the studs you found in Step 1. The bracket has multiple screw holes along its length - you want screws going into both studs, two per stud for the Classic or one per stud for the Slim.
Pre-drill the screw holes through the bracket and into the studs. Use the drill bit included with the install kit - it's sized exactly for the screws and the bracket holes, so you don't strip the wood or split the stud.
Drive the screws all the way home. Torque the bracket to the wall as tightly as you reasonably can without stripping or shearing the screws. The harder the wall-side bracket is fastened, the more rigid the finished shelf will be. A loosely-installed bracket and a fully-torqued bracket will initially carry the same nominal load, but the loose one will feel less rigid in use and develop slant over time. In some cases, you may need to back this off slightly if the wall is bowed since the Hovr Bracket needs to be straight to engage.
If the bracket is loose or wiggly, retighten the screws or check that you actually hit the stud.
Step 4: Engage the Shelf
Now for the satisfying part. Lift the shelf and lower it into place at a downward angle into the wall bracket from above, with the female bracket in the back of the shelf engaging the male bracket on the wall.
The shelf will likely sit at a slight upward angle initially - that's the wedge profile of the bracket needing to fully pop into place. Tap the back of the shelf firmly with your fist to seat it fully. You should feel and see it drop the last fraction of an inch into place, sitting flush at 90 degrees off the wall.
Once the shelf is seated, locate the set screw holes along the underside of the shelf. Use the included hex key to secure each set screw upward into the male bracket. These set screws are the mechanical lock that keeps the shelf from being knocked off the wall - they're a safety feature, but they will also help stabilize the shelf once in place. Tighten them firmly into place to secure the brackets.
The shelf should now be locked in place with the brackets fully concealed.
Step 5: Test Before You Load
Before you put anything on the shelf, push down on the front edge with both hands and check that the connection is firm and secure.
If you see noticeable deflection or movement, stop and re-check:
- Are the wall-side bracket screws torqued fully into both studs?
- Is the female bracket fully engaged with the male bracket along the entire length?
- Are the set screws driven home?
- Did the female bracket bite into solid backing inside the shelf?
If everything checks out, load the shelf gradually. Start with a fraction of the rated capacity and work up. Don't dump 300 lbs of dishware on a fresh install - give it a few minutes to settle and re-test under partial load before going to full.
Common Mistakes That Cause Slow Failures
These are the things that won't fail your install on day one but will catch up to you in six months:
- Skipping the second stud. A single-stud install on the Hovr Classic reduces real-world capacity to roughly 100–120 lbs, regardless of what the bracket is rated for. If your loads exceed that, you must catch two studs.
- Snug instead of torqued. A snug wall-side bracket feels solid on day one but may develop slant over months as the install settles. A quick torque might help stabilize.
- MDF panel edges as backing. Set screws in the female bracket will pull through MDF panel edges over time. The bracket needs solid wood, plywood, or properly built MDF box construction with internal backing rails.
- Drywall anchors instead of studs for heavy loads. Even "heavy duty" drywall anchors top out around 50–75 lbs in practice. For true strength, always find the studs.
- Loading too heavily too fast. A fresh install benefits from a brief settling period. Don't put the full rated load on it within the first few minutes.
Substrate Notes (Non-Wood-Stud Walls)
If you're not installing into wood studs over drywall:
- Metal studs: Use self-tapping metal-stud screws sized for the bracket. Rated capacity is reduced from the wood-stud number.
- Concrete or brick: Use concrete anchors (we typically recommend the blue Tapcons if you can find them) with a hammer drill. The flat-back Hovr profile sits on top of the wall and typically maintains full rated capacity provided the anchors are sized correctly.
- Tile (over wood stud): Pre-drill through the tile with a tile bit, then drive screws through the tile into the stud. The bracket sits flush on top of the tile.
- Drywall only (no stud): Use heavy-duty drywall anchors - the EZ-Load anchors Hovr sells separately are rated for the lighter case. Limit loads to roughly 50 lbs total.
FAQ
Q: How long does the install actually take? A: About 45 minutes per shelf once you've done it once. Your first install will take longer - closer to 90 minutes - because the routing and prep steps are slower the first time.
Q: Do I really need a router? A: For a hidden bracket install, generally, yes - the channel needs to be routed into the back of the shelf. If you don't have a router, many lumber yards and woodworking shops will route it for you for a small fee, or you can buy pre-routed floating shelves that are already prepped for the Hovr Bracket System. We've always seen people use a dado blade and multiple passes to cut the channel in North America but you want to be an expert before making those types of cuts and you need to know what you are doing.
Q: Can I install this alone or do I need a second person? A: For shelves under 4 feet, one person is fine. For longer or heavier shelves, a second person makes the engagement step (Step 4) much easier - you can hold the shelf level while your helper taps it into place.
Q: My wall has plaster instead of drywall. Does this still work? A: Yes. Plaster walls have studs behind them just like drywall walls. The screws need to be slightly longer to account for the thicker wall surface, but the install is otherwise the same.
Q: What if I find out partway through that the shelf doesn't have proper backing? A: Stop. Don't drive the female bracket screws into MDF panel edges hoping it'll hold. Either modify the shelf to add backing - a strip of solid wood glued and screwed inside the box works - or replace the shelf with one designed for floating-bracket installation.
Q: Can I move the shelf later if I need to? A: Yes. The Hovr system is mechanically locked, not glued. You can remove the set screws, lift the shelf off the wall bracket, unscrew the wall bracket, and patch the small screw holes. Far less wall damage than two-prong systems that require epoxy.
The Bottom Line
A floating shelf with the Hovr Bracket System that holds 300 lbs isn't difficult to install. It's just a different process from a shelf that holds 30 lbs. The bracket has to be firmly anchored into studs, the install has to be anchored nice and snug, and the shelf has to have a sturdy backing where the bracket bites.
Get those three things right and the shelf will hold its rated load for as long as you own the house.